Thursday, July 31, 2008

Tenon making jig

I came across the idea for this jig on a website. It begins with a simple piece of plywood, I used some of the 9mm ply I had left over from the toolbox project. 

You cut a rectangle, in this case 380mm by 280mm and remove the corner of the edge that will run along the fence of the router table.

Then you glue and screw another smaller piece at right-angles to the fence edge and add the toggle clamps.

I've added a small ply platform under each clamp to raise the lever point of the clamps.

I haven't tried it on my router table yet, but the wood for the blanket box is coming tomorrow and I wanted to be ready!

Toolbox (2)

The next step in making my toolbox was to split the top section into two pieces. The smaller piece would be fixed to the main carcass and the larger piece would form the drop down lid.

There are at least three ways to cut this section. You could do a straight 90 deg. cut, or you could go for the more traditional curved cut. Remember, if you are making the box from a single piece of timber, you must cut the curve or shoulder before putting on the front skin. 

I chose to go for a shoulder cut with a 45 deg. angle. The shoulder is 18mm wide to accommodate the hinge batten that will be glued and pinned to the plywood edges crated by cutting the two pieces. 

I decided to use simple dowel joints to attach the bottom section to the main carcass.

I carefully, very carefully, marked four pin positions and used my square to make sure the drill was perpendicular in both planes as I drilled the holes.

The fit was very good, so I glued and clamped the assembly together.

After that I added two battens inside the lid and carcass to take the hinges. Leaving this all to dry, I went put to buy the hinges and catches and handle. 

I chose a lie flat case handle that I could bolt to the top of the case and some simple case catches.

I took my time setting out and cutting the hinge rebates. I've always found hinges a challenge, getting the rebate the right depth and then making the fine adjustments that need to be made just takes patience. I can see why someone invented the cabinet hinge that kitchen manufacturers are so keen to use.

The finished box looks like this. Of course all the catches and the handle will need to come off in order to sand and finish the box, but it's taking shape.

Before I packed in for the day, I applied woodfiller where needed ready for sanding and finishing. The next job is to make the trays or till to go in the top of the box and decide what to keep in it and how to fix them in position.

Tuesday, July 29, 2008

Toolbox project

As I said before, this project was all about using materials that could be purchased in a DIY store, so this morning I went off to Wickes and bought the timber and ply for the carcass. 

Here are all the pieces cut to length for both sections of the box. The next step was to run a rebate down the outside edge of the pieces for the plywood skins.

Here's me using my home-made router table. It took a little while to adjust the depth and width of cut, but after a few test cuts I finally had it adjusted as I wanted it. I cut a rebate 9mm deep and 11mm wide. 


Here are finished rebates. Not too bad even if I say so myself.

Once the rebates were cut, the next step was to work on the dovetails for the main carcass section. At this point I hadn't decided how I was going to join the pieces for the front of the box, so  I put those to one side while I worked on the dovetails. 

It's confession time now. Carefully I worked out the distribution of the dovetails and set my bevel gauge to 1:7. I then transferred all the lines to the first end of the first side. Unfortunately somewhere along the line I managed to draw them completely wrong and cut them what looked like upside and inside out. Anyway, I managed to recover the error but the joint wasn't a pretty sight. Ah well, these things happen. I'm not the first to get it wrong and I won't be the last and I refuse to beat myself up about it. 

With a little more concentration I managed to get the other corners correct and they fitted together quite tightly. 

I actually tried a technique for cutting the dovetails that I'd seen demonstrated on the woodtreks website. It was definitely quicker than the way I'd been taught in school, I may continue to use this method for future projects.

Having glued up and skinned the main carcass I decided to use simple butt joints for the other section. I think they will be strong enough. 

The skins are glued and pinned in place, and the pins are punched below the surface.

The next job will be to cut the front section into the flap and the bit that fixes to the carcass. The obvious way to fix the main carcass to the smaller front section would be biscuit joints. But I don't have a biscuit joiner unless I go shopping in the morning!

After that it's hinges, handles and one or two draws or tills for the box. I also need to decide on a finish, traditionally black, and how to best use the internal space. The chest my Dad made had all sorts of little posts that fitted into saw handle and held them in place. some creative thinking needed.

Next projects

My next two woodworking projects are about to start, if only it would stop raining! This is the problem with not having a workshop.. as I keep telling Anne!

I took the plunge and ordered the prepared timber for the blanket box. It's not a particularly complex construction, just a series of rails and uprights with plywood panels. I'll post some pictures if it looks okay when it's underway.

The other project is an old fashioned carpenter's tool box. I'm going to make this from the timber you can buy at a DIY store. I went to Wickes because historically it has usually had the better timber of the DIY market and because they do 9mm plywood, not something you will find everywhere.

Traditionally you would make the toolbox from a board wide enough for the whole box and then separate the lid from the body with a saw after gluing it all up and skinning the box with the ply. But unless you go to a timber merchant that will prepare timber to size, you won't find anything wide enough to do the job. You could edge join narrower pieces and then follow the traditional path, but I'm going to make a main box and a lid section separately. Obviously this will need to be quite precise and may not be as good a fit as the saw separating method, but with care I should get a reasonable result.

I'll let you know how I get on.

Stanley, Bailey and Record

After a little bit of research I discovered that Leonard Bailey was an American inventor of hand tools and that the Stanley Company bought his patents and company in the late 19th century. There was a falling out, but Stanley continued to use the name Bailey on it's planes, which explains it's presence on the try-plane I was talking about (I think that this is probably known as a jointer plane or fore plane in other circles).

Stanley is an American tool manufacturer. Record, on the other hand was a British company in Sheffield if my memory is correct. But Stanley did manufacture planes in the UK. It's possible that the blade is a replacement blade, but there may be more to this story. I'll have to see if I can find a serial number or model number somewhere on the plane. 

Having checked an 'old tools' website, some of these planes are worth between £70 and £140. Although there are plenty of other places where they go for a lot less than that. I'm not actually interested in the price because I have no intention of selling this plane.

My particular plane is a Stanley Bailey No. 6. Made in the USA, it has the kidney shaped screw hole in the lever cap rather than the keyhole design my other planes carry. There's date or patent information I can see. It has wooden handles.

I'm so glad I kept this from among all the things I found in my Dad's garage after he passed away. There were a couple of other planes I found. One is a standard jack plane, a No.4 smoothing plane I think. And then there was a shoulder or rebate plane by Woden with various bits missing.

I might just do a little research on these too.

Monday, July 28, 2008

Just today

Being on sabbatical should be rewarding, the hard thing is figuring out what the reward looks like! Today was a nice day, a day of pottering around finding things to do. For example I went to the timber yard to talk about the wood I need for a project I have in mind. Tomorrow I'll probably put in the order so that I can actually make a start on the famous blanket box I said I would make. The only problem of course is that in my mind it is a beautiful piece of handmade furniture, carefully crafted. The reality is that it might not be, but I won't find out unless and until I build it. So I need to take the plunge.

 This gets me thinking about life and church. Take my swimming. Two years ago I couldn't swim. Not a stroke. When asked if I swam, my answer was simply, "Only vertically." A few months ago I was really quite frustrated because I still hadn't worked out the breathing technique to enable me to swim any reasonable distance without having to stop and stand up. Then all of sudden, on holiday, I began to swim with my head up. Not good for the back, but something that everyone else made look easy. And now I can do that too.

So today I went for a swim and as I swam I thought to myself that if I can swim with my head out of the water and swim with my head under the water, then breathing is just a matter of timing. Having wandered up and down the pool a few times doing this rather erratic breathing pattern a thought struck me. If I could swim with my head out of the water on breaststroke then I should be able to clear the water to breath on front crawl. So I tried, and it worked. Timing was not all it could be, but it worked.

So is there a point to all of this? You tell me. It's just that sometimes I get the feeling that as Christians we don't keep going as much as we should. Just as people we probably lack perseverance, and what we sometimes lack in perseverance we make up for in timidity. The swimming thing is immensely frustrating, but I just have to keep getting back in the water and trying again and again. 

I don't know whether that means that there are some things about which I have been too timid or others about which we've been too ready to give up, but there are things to do and things that will just take courage and discipline to do.

I wonder, is faith a matter of courage and discipline amongst the more obvious things?

Apart from deep, philosophical thinking, I spent some time today reconditioning my Dad's old try plane. It says Stanley on the frog, record on the blade and Bailey on the main body. It was either put together form parts or these three companies worked together. I might see what I can find out. Just in case you were worrying that was taking my time off too seriously!

Sunday, July 27, 2008

Showhome opens

We visited the first show home at the Wixams development yesterday. Had an interesting conversation with the person who showed us round, and the house was an interesting design too.

First off it's a three storey house, as are many on this particular site according to the brochure. The master bedroom is at the top, complete with an en-suite shower room. There is a study, for home working, but if you want anything more than a desk and waste paper bin, you'd be pushing the space to capacity. Not designed for someone like me who works from home using lots of books and resources.

What also caught my attention was the lack of a dining room. When  I was growing up, we had a large kitchen in which we had the dining table and a separate lounge. But the last three main homes we've had all had separate dining rooms and it felt strange to be in a four bedroomed house without one.

Still, this is the first housebuilder on site and it will be interesting to see what others build. Strange to think that it wasn't that long ago that Sovereign Park, the newer part of Shortstown, was built and most of the four bedroom houses were detached and had dining rooms and maybe even utility rooms too.

Saturday, July 26, 2008

Veritas and Trend prices

By the way, in case you wanted to know...

I got the Veritas guide from D&M Tools for £41.95 and the Trend Fastrack from Screwfix at £49.99.

The Fastrack is also available from QVC (it showed up in a search I did the other day), and by the look of it, it comes with two extra stones compared to the standard package.

Veritas vs trend

So, my roughing stone arrived for the Trend Fast Track and I gave it a go with a chisel I'd worked with on the grinder. It was fairly flat and had a reasonable edge to it, but it wasn't great.

The roughing stone made a good enough job of removing the high spots on the bevelled edge from my freehand grind. But, once again, it did make my wrist ache. Whether this is a technique issue or just a facet of working with old tools that have been sharpened and ground  not to the set angles of the Trend I don't really know. The final finish was very good and very sharp, just about sharp enough to shave a few hairs.

The Veritas guide is easy to set up and to adjust. The Trend has only the two angle available (25 and 30 degrees), whereas the Veritas has many more from which to choose. Given that most woodworking tools are sharpened to 25 or 30 degrees the Trend has what is needed, that's not an issue. Where the Veritas scores over the Trend system is that you can apply a micro-bevel which you cannot do on the Trend. I was always taught at school that you had your primary bevel and then your cutting bevel, but that's not a general rule these days, or so it seems. Another plus with this feature on the Veritas is that you don't have to reset the tool to grind the micro-bevel you just flip a turn lever on the back.

Overall I found the Veritas guide much easier and less tiring to use. Both cost around £50 to buy. With finer grits I'm sure the Veritas will give as good an edge as the Trend.

So, the big question, which one would I buy if I could only have the one? On balance, the Veritas because it's more versatile and less wearing on my hands and wrists.

Friday, July 25, 2008

The Veritas Mark 2

In the previous post I mentioned that I'd bought the Veritas Mark 2 guide, and that I'd used it to good effect. Here's brief introduction to the guide.

The guide comes in two parts, the honing guide and the angle setting guide. The angle setting guide slides onto the front of the honing guide and the angle is selected by a positively positioned guide and brass screw. The markings are very clear and there is a wide range of adjustment.


The honing guide allows you to select an angle range (1, 2 or 3) reflected on the angle setting gauge.

The chisel or plane iron slides in and up to the gauge on the underside. Once engaged and locked, the blade is ready for sharpening.


The Veritas is heavy compared to other guides, but it isn't heavy to use. It's solid. The wide roller gives great stability and a micro bevel adjuster on the roller gives you a fine edge without having to reset the tool.

If you need a guide for honing tools, then I'd recommend this one even though I've only had it a day.

Reconditioning old chisels

So, having watched the arm shaving video I was intrigued about how he got the chisel so sharp and, having spent a long hot day working on some old chisels using the Trend Fastrack, I thought I give the sandpaper method a try.

I actually took the plunge and bought the Veritas Mark 2 honing guide, and a very solid piece of kit it is too. I don't have all the grits and I don't have the bench grinder with a buffing wheel, so razor sharp was probably out of the question.

Here's what I did:

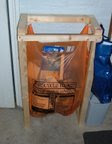
The starting point. This is one of the chisels I inherited from my Dad when he died a few years ago. It was pretty grubby.

The first thing I did was use a small strip of coarse sandpaper to clean up the back and sides of the cutting end of the tool.

I used some 80 grit and then some 150 grit to get all the pit marks and rust and dirt of the blade.

Cleaned up, the back of the blade looks like this:

This only took a minute or two and whilst it not a mirror shine it's a long way down the road to becoming a usable tool.

The next step was to work on the bevel. There was a fair amount of material to be removed, and with a grinder to hand and either a tool guide or a steady hand that would have been relatively quick. But I don't have those things, so it was 80 grit paper and elbow grease.

Setting up the Veritas was very quick and simple. Just position the angle guide, set the angle and slide the chisel in and then lock it in position.

This is really a very good guide and I think it is worth the cost (it's not cheap, but you do get what you pay for). My other guides are less costly but much more difficult to set up accurately and repeatably. I suspect that the Veritas will give repeatable settings every time. Of course the angle set on the Veritas doesn't match exactly the angle on the Trend, but then you wouldn't expect that really. 

I did sharpen one chisel using both the Veritas to do the initial work and then the Trend to finish it off. This gave a good edge and was much quicker than yesterday's long toiling, finger aching day using just the Trend.

After about five minutes work I now had a useable, if not razor sharp, chisel. The shavings in the photograph may look rough but they were actually quite fine. 

My conclusion after all this is that I still have a long way to go to get a really sharp edge, but I'm more confident that I can get a good working edge on a chisel and plane iron with less effort and more accuracy than before. Using sandpaper glued to a board is certainly effective for much of the work, and the Trend is always there to give a better edge with more practice.

I used ordinary spray mount (the kind you use for display work and photographs) to adhere the sandpaper to a piece of old plywood. One tip, make sure you glue the paper close to a usable working edge of the board. That makes getting the back of the blade nice and flat for the first stage of the process.

Thursday, July 24, 2008

Knols

Just got an email from Google about their new project "Knol". It looks quite interesting as a way of writing articles and papers that are longer than a typical blog entry should probably be (I say probably because no one I know has ever defined what length a blog post ought to be, if that were possible). Anyway "knols" are "units of knowledge" and you can visit the Google Knol site here

As yet I can't see a way of connecting any knols to my blog in a sidebar widget or the like, but I guess that will come. As it stands you have to know that an article is there or just go to the site and search. Some sort of RSS feed along the lines of Goggle alerts would be nice. 

I've added a knol about how we are trying to develop pastoral care at Cotton End. If you search "pastoral care" from the home page you should find it should you wish to read it.

I've tried using Google Groups for collaborative projects but that relies on specific people picking up the thread and using it. This may be a way of inviting wider interaction. 

We will see....

Improving my swimming

As some regular readers may know I learnt to swim a couple of years ago. In the two years that have passed two things have continued to evade my grasp. Firstly getting to grips with figuring out how to breath as I swim. Only being able to go as far as I can on a single breath has been a source of great frustration.

Secondly, I've never been able to swim with my head out of the water, which I know is not the best way to swim, but it's just something I haven't been able to do. 

The inability to swim in this inefficient way is one of the reasons I never learnt to swim in the first place. I just sank.

Anyway, while we were on holiday I managed to swim a little bit of breast-stoke both with and without my head in the water. I thought this was because of the salt water pool aiding buoyancy. But here's the exciting thing (exciting for me anyway), Ally and I went swimming today and I managed to do several lengths of the 13m pool breast-stroke! Quite an achievement for me, and one which gives me great pleasure. I can't wait to go again and do some more practising.

Roughing stone

Just a quick update to the last post about the Trend Fast Track...

Through the Trend website I discovered that there is a roughing stone for use with the Fast Track. This might speed up the process of reconditioning older tools without the need to go to the grinder.

The cutting edge


The one thing about woodwork that will always remain true is that you can't get far without sharp tools and putting a sharp edge on a tool is a work of art that eludes most casual woodworkers most of the time. I can get a sharp edge, but it often takes me far longer than it should. I've tried all sorts of approaches including guides and freehand. 

Yesterday I gave the Trend Fastrack system a try with some success. 

The block plane I sharpened came out really well, but most of my other tools are quite old and have been ground and sharpened many times. So much so  that the primary bevel needs regrinding and that takes a lot of work with the basic set up that comes with the kit. I suspect that if I get a more coarse starting stone things would be better in terms of reconditioning older tools.

Overall the jury is still out on this jig.

I also watched a video of a tool called Worksharp, but it's not yet available in the UK. The other approach that was new to me, and looked worth a try was a simple system using a guide and sandpaper to produce an edge so sharp the guy in the video shaved his arm with it!

Watch it if you want:


Wednesday, July 23, 2008

The view from there

This is the view from our balcony. Not particularly spectacular from this angle, but what's noteworthy is the steepness of the site. 

The two pools are probably the equivalent of two stories apart. The curved pool is on level -3, reception being on floor 0 about level with the parked cars. We're the equivalent of four stories above reception.

Of course if you live in a typical UK house, you probably have around 13 steps between floors (we have 16 in our Victorian house), so going from the balcony to the pool would be like going downstairs 14 times and more importantly, going back up would be like going upstairs 14 times!

Needless to say we rarely went back for anything other than a rest.

Tuesday, July 22, 2008

Botanical gardens

I took a lot of pictures at the botanical gardens, here are just three.

The gardens were terraced, but the initial access was down quite a slope.

Apart from plants there were some sad looking birds in a variety of cages (not a thing I particularly like to see) and two peacocks roaming free (which is quite nice to see). One of the peacocks was white, something I've never seen before.


Holiday photo's (2)

This is Madeira's main road on the southern side of the island. Essentially it's a dual carriageway either on stilts or in a tunnel! Not as scary as the time I drove through the Alps, but occasionally stomach-achingly unnerving.

At one point there is a slip road on and off the main carriageway in a tunnel. That's not a thing I see every day. 

Our accommodation was about 30-40 minutes drive from the airport along this road and then up a couple of mountain roads. You had to have your dipped headlights on for the tunnels, but to be honest the tunnels were so frequent it wasn't actually worth turning them off until you left the motorway.

This picture was taken from the Botanical Gardens outside Funchal.

Holiday photo's (1)

This is Cabo Girao, either the highest or second highest sea cliff in Europe (according to the guidebook). 

The line of apartments (top right) is part of the complex in which we were staying. 

The cliff drops away from 2,000 feet down to the ocean below. 

There's a view from the other side here.

Dropbox

This is "one to watch" if you're interested in synchronising files across multiple Macs and even PC's.

Still in beta, the website makes some impressive claims and it looks quite promising

To Twitter or not to Twitter...

At the request of my daughter, Ally, I've signed up to Twitter to see what all the fuss is about. I've added it to my sidebar, but I'm not sure for how long I'll actually use it.

It's quite simple to set up and I've set up my 'phone so that I can use the SMS service to update my status. 

Router table

Here's my router table, complete with the nvr switch.

Adjusting the depth of cut and the fence is a little tricky, but it's quite manageable, it just takes time.

I ran a couple of rebates on a test piece and I also cut a simple groove in another sample piece. Concentration and not rushing are clearly the key to getting a good result, so a bit of practice is called for.

To mount the router I had to find the right sized bolts and cut them to length. Mounting the router was a three handed job, but I managed with the two I have. It was just a bit exasperating, especially when I dropped one of my nice new brass bolts into the grass and spent 10 minutes looking for it!

One tip I learnt from an engineer at the laboratory where I first worked was that when cutting bolts always put the nut on first. Then, when the cut is finished, file the cut end smooth and slightly domed shaped. Then unwind the nut, which will re-cut the thread as it goes.

I've thought about how to add dust extraction. I've cut a v-shaped end on a piece of sink waste that I'll glue to the fence and to which I hope I can attach a vacuum hose. Tesco have a vacuum cleaner for £15 which should do the trick. On the other hand I might splash out £40 for a bagless one!

Monday, July 21, 2008

Desert island

It's all systems go for this year's holiday club at church. 

This was last Saturday when a small team set to painting the set for use in a couple of weeks time. The set itself is built from thin plywood over a wooden frame. The three sections were originally made for Christmas last year and painted as a stable. 

We've just put them together in a different order to use this summer. My only claim to fame in this project is that I built the original set and modified it for use this summer.

Here's a back view to show the complicated nature of the construction!!


Thursday, July 17, 2008

The joy of cats


You may recall my post about our evening catching a mouse and releasing it into the wild. Sadly this is a regular part of our lives given that we live with two cats. Most of our rescues have been successful, I'll gloss over the time I rescued one small rodent from the clutches of our cats only to inadvertently, and rather carelessly in my opinion, squash the poor thing in the process of carrying it out into the wild!

Pip, our larger cat and brother to Jade, my study partner, is going through a hunting phase at the moment. To be precise he's going through a catching phase. He's always gone hunting, I just think he's surprising himself and actually catching the things as well. He certainly looks surprised when he arrives back with his prize.

Normally these gifts are left near the back door for us to find at our earliest convenience, but if the door is open he makes sure we get the opportunity to play by bringing the traumatised creature into the hall. Of course the hall presents the said animal with the largest number of directions from which to choose as potential escape routes, clearly designed to increase our enjoyment of the chase. Or not. 

This evenings offering was somewhat worse for wear and was easily caught using my upturned biscuit tin technique, honed during one particularly long night spent squeezed between a wardrobe and a wall.

This all rather nullifies my argument for not having a dog. I've always argued that dogs require more care and you have clean up after them. Small boys may be fascinated by the idea of carrying a plastic bag of doggy waste around with them, but I am profoundly not interested in so doing.

On the other hand, chasing mice and occasionally having to deal with the still warm stomach contents of a cat who ate to fast is similarly distasteful.

In the end I guess it true, you're either a cat person or a dog person, and I'm a cat person. So I'll just have to put up with the occasional mouse hunt and clear up for the sake of the pleasure of the company of two very fine felines.

Cleaning the closet

As we continued to sort through our accumulated paraphernalia, today was the charity shop run. Knowing we were going gave a little impetus to having a quick rummage through the wardrobe. 

I really should be able to fit all my clothes in the one wardrobe and chest of drawers, but I can't.  Due mainly I suspect to being unwilling to get rid of certain items. Things I might wear again one day. However, "one day" is rather unlikely to come around any time soon. 

I also have this habit of taking old clothes and declaring them "work clothes" as in clothes to wear when doing jobs around the house. This pile of old clothes grows and I suddenly realise that I have more "old jeans" than new ones. 

So, having sent some stuff to the tip and some to the charity shop, tomorrow may be a day to have a sort through the work clothes and narrow that pile. I may also get rid of the original packing boxes for my camera that are in the bottom of the wardrobe!

Wednesday, July 16, 2008

A Little Decluttering

There is something quite satisfying about going to the household recycling centre with a boot-load of stuff that you should have dumped years ago. Today was such a day. 

Anne and I, mostly Anne, attacked the fourth bedroom in our home. It's where we keep a lot of things that don't have a proper home. There are paperback books and maps and photographs and more books and toys from Ally's younger years.

Some things brought back many memories and being ruthless about what to keep gets harder as the junk pile grows. There's a picture I've had since I was 17, cassette tapes of radio shows from the early eighties, and a thousand unsorted photographs and slides. I also found a bag of things I made for doing talks at school assemblies. 

I envy those folk who don't seem to accumulate anything at all. How they do it I just don't know. Perhaps one day I'll work it out and we won't have to have days like today. On the other hand there's a sense of a life lived as you sort through things you don't really need but somehow they inform your life and jog your memory.

And, by the way, we recycled as much as we could.

Tuesday, July 15, 2008

Nuisance calls

Snozwangler is a website that traces telephone numbers. If you get those silent calls, or pick up the 'phone and dial 1471 wondering who has just called, then this might help. Just enter the number and it will tell you what it knows.

Monday, July 14, 2008

Been Away

Okay, so you might not have been wondering where I've been for the last week, but in case you were...

We've been away for a holiday to the island of Madeira. Set in the Atlantic ocean off the coast of Africa north of the Canaries, Madeira is a mountainous island rising out of the sea. We were staying at a place called Cabo Girao, either the second highest or the highest sea cliff in Europe at 605m. I'll post a few photos later, but to give you idea of the place, we were towards the top of the sire and we had 103 steps to climb or descend if we wanted to get the reception area. From reception there was a lift that went down the three floors to the pool. If you walked all the way it was 183 steps from our apartment to the pool, but that wasn't the bottom of the site. I didn't count the steps up to the tennis courts, but I guess there were about 40.

The day I walked down to the lower gate and back I must have climbed at least 230 steps and taken in a sloping path too! Apparently some of the early feedback they've had about the place (it's only been open 18 months) is that it's steep! Well, well done everybody for spotting that one!

It has to be said that the island itself is probably best described as steep. Everywhere is either ear-poppingly up or down hill. The main high speed road, the "via rapida" is a series of tunnels and elevated sections of dual carriageway. Frightening to someone who doesn't like heights like me! But I made it, and more to the point Anne and Ally never complained once about being too close to the edge.

Saturday, July 05, 2008

Technical drawing


I'm rediscovering the joy of simple technical drawing for woodwork projects. I don't know if anyone gets taught to do this anymore, and I certainly don't remember all the techniques and details of what I should do, but a simple orthographic drawing ( as we used to call them) of an idea yields some  useful data. for example, you can write out a cutting list for all the parts and work out what wood you are going to need.

It's also a helpful way to visualise any problems you might encounter. 

I saw an internet article about how to make an carpenter's toolbox and remembered the one my father made many years ago. By the time he passed away it had begun to fall apart and I decided at the time that it wasn't worth saving. I should have thought more carefully and at least photographed it for future reference. Anyway, the article caught my eye, and I thought it would be a good next project to tackle to improve my skills. 

I thought about a few adaptations to make, and wondered about the value/difficulty of making the waterfall front. Cutting an even curve is quite a skilled task, especially with a coping saw which can be a bit tricky to control. Wandering off line into waste wood is one thing, but when you're cutting the shape into the lid and the box in one go, it's more of a challenge.

So I considered cutting a simple 45 degree angle instead and drew the box accordingly. It was then that the drawing showed a potential problem. A 45 degree cut means that when you add the rails for the hinges you have an angled cut across the end, not very aesthetically pleasing. So I'll have to come up with other alternatives. A 90 degree cut would work, but maybe there's a cranked alternative. Back to the drawing board then to draw out the alternatives and see if they are possible.

I may have to go for the tricky coping saw curve after all!

Friday, July 04, 2008

Mission and the church

Just to demonstrate that I'm not becoming woodwork obsessed...

I was thinking this morning about the church in general and the church of which I'm a part in particular. I was thinking about how the ethos of the church and the stated vision and purpose of the church are so often quite different. And I was wondering how you get to the point where you see that clearly and you take responsibility to change whatever needs to change in order to move to where God is calling you to be as a people seeking to follow him.

This thought struck me. The problem is that we don't see. We don't easily perceive the truth and our, sometimes long, histories have generated ways of thinking that obstruct our ability to see. We need fresh eyes.

Here's my fresh eyed simple take on one issue in church life:

Mission doesn't happen because the church exists, the church exists because mission happens.

You see, it seems to me that we've got ourselves into a mindset that says that mission should be a result of the church becoming the active organisation where every member is engaged in sharing their faith with as many people as possible. And it becomes possible therefore for the church to continue to exist even when it doesn't engage in mission because the church comes first.

But maybe, just maybe, we need to remember that the church is born in and out of mission. In and out of incarnational involvement. In other words, the church can only exist as a result of missional engagement. No mission, no church.

Whether the proverbial chicken came first or the egg doesn't matter, because as far as the kingdom matters, it was mission.

Thursday, July 03, 2008

Fixing little things

In order not to appear to selfishly self-absorbed about enjoying myself making things for me, I've also tried to do a few jobs around the house. I decorated the bathroom and added a towel rail and a few other things to finish it off. 

My second task around the house was to attack the utility room and downstairs toilet, both of which had become a little disorganised to say the least. One thing that has always annoyed me, or grated a little, is that we have these orange sacks for recycling, but where to do keep it while you are stuffing it full of plastic and paper? 


The solution, a handy frame on which you can hang the bag. I had some left-over 45mm square timber, so I made this little frame, added a couple of hooks lying around in my bits-and-bobs box and there you have it!

I guess they'll deliver the recycling bin next week! 

Woodworking project 2

I have to say it's a lot of fun playing with wood, and having fun is a good thing, especially on sabbatical. So, project #2 was to build a table for my router. I bought my router a good few years ago and did a short two day course on the basics, but I know there is so much more one can do with this little tool. I could have gone out and bought a simple table to mount my hand-held machine in, but I wanted to practice a few skills and build my own. 

I started with a simple idea of a strong frame and simple top. The frame is 45mm square timber, available in most DIY outlets, and the top is 12mm mdf, available in the same store. In fact I've only used materials that you don't have to go to a specialist outlet to get. Here's the frame partially assembled.


The mortices were cut with the router, the tenons by hand.

I have to confess that I didn't make a great job of these joints,  but it was the first try and last time I made M & T joints I was 15 years old and cutting them by hand from start to finish. I think I should have invested some time making sure all the timber was square, I made the mistake of assuming when you bought square finished timber it was reasonable to assume it was what it purported to be!

Once the frame was done, I made the top. The mdf is about 500mm square and screwed to a wooded sub-frame to give it a little more rigidity. A whole is cut in the centre for the router bit to come through and then four mounting holes have been drilled through ready for the router. This does mean that I'll lose 12mm of the depth of cut, but I don't think that will be a serious problem for what I want to do. The mark 2 may be modified to bring the router nearer the surface. Here's the top on the frame.

After the top, I turned my attention to the fence. You can see it on the picture. It's made from two pieces of strip wood with small triangular supports to hold the right angle. 

Once this was made, I added a piece of 12mm mdf to the front to make the fence taller and stronger. In the next picture you can see the whole for the router and you can just about see the rebate in the fence to allow the cutter to sit inside the line of the fence. On the tabletop are two angled guides that can be clamped, on to the fence and one to the top to help guide timber across the cutter (at least that's the theory)

The final picture is a simple roller that can be used to support longer lengths of timber beyond the table. It's made from scrap pieces I had lying around. A piece of curtain pole, some old plywood and a couple of lengths of timber.


I just to get some countersunk bolts to mount the router, and I'm ready for action. I guess if I want to be really safe I should add a NVR switch which I know I can get online somewhere.

I'll let you know how well it works.

Wednesday, July 02, 2008

Welcome to July

So, I'm now into my second month of my sabbatical. The first month has gone very quickly. My plans to build the blanket box and wardrobe may have to be delayed as I put in some more practice at the woodworking bench. I don't want to start something that I'll always be disappointed with because of poor skills that I know I can improve. 

Yesterday I spent the morning tidying our utility room, which included building a simple timber frame in which I can hang the recycling bags. It's rather nice to have had a simple idea and being able, and having the time, to fabricate it. This is the joy of being on sabbatical, it gives you the time to do things that otherwise would get squeezed out of a typical schedule. 

During the normal run of things, with one day off a week, and lots of meetings, there's little time to do all the things one would want to do. Of course this isn't any different to the calendars with which everyone typically works. Retirement beckons simply in order to fit everything in!

I hope that this month I might be able to combine some relaxing woodworking with some walking and some reading too. It seems I need just as organised an approach to being restful as I do for being busy.