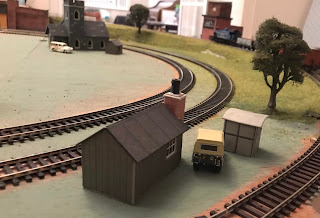
Adding scenery to the layout was always part of the deal. It began with some of the buildings about which I have already written. But what about grass and trees etc? Well, here's the progress so far.
It still need more grass adding, but I'm waiting for a better state grass applicator to arrive. For those who don't know, static grass doesn't refer to a lack of movement but the way it is applied. It uses a static charge to make the grass fibres stand up. You can do this with a plastic bottle, but that doesn't seem to have worked particularly well.
I've used a process I saw in a video by Kathy Millat, although the layering spray I bought was the same product it was not in the spray can but an aspirating type bottle which may have made a bit of a difference. I also used a puffer bottle rather than the electrostatic applicator which I have now ordered to try on the next area.
 The trees came ready made from Model Scenery Supplies, as did much of the static grass. I built the embankment from PIR insulation board (Cellotex in my case). It's easy to carve and shape using a sharp kitchen knife.
Small gaps were filled with decorators caulk. On reflection a more rigid filler might have been a better choice but this was what I had lying around in the workshop.
Once that was all dry we covered it with strips newspaper and used standard PVA glue to fix it all in place.
I wasn't too worried about making it super smooth because that wasn't the finish I wanted. I wanted something uneven and less cultivated looking.
Once dry it got a coat of poster paint to give a soil like base. Even at this stage it was looking okay although there were a few cracks that needed sorting out. I painted a few area white and grey using acrylics and washed them with a black wash to make bits of chalk face show through.
Some got covered up with grass when I forgot to avoid them with the base glue and layering spray!
Which brings me to the grass application process. As I mentioned, I didn't;t find the puffer bottle that easy to use. I ended up spraying grass fibres all over the place. That's not a big problem, but I did feel that it made getting the stuff in the right place a bit of a chore. I also found that the base glue went off very quickly. Perhaps the painted paper absorbed it too quickly and Male a base coat of PVA to seal the surface first might have helped.
 In the end I'm quite pleased with how it's turning out. Having added some line-side fencing and a few tress has made this corner of the layout really come to life.


No comments:
Post a Comment